MeltingMirror Cosplay

  • Home
  • Costumes
  • Upcoming
  • CosBlog
  • Media
  • Contact Me
  • Home
  • Costumes
  • Upcoming
  • CosBlog
  • Media
  • Contact Me

Wig Dyeing Guide V.2.0

9/9/2015

1 Comment

 
MM Ragyo
Rainbow wig activate!
There are so many ways to dye a wig and some methods are easier than others. Here’s a breakdown of several techniques including some tips and tutorials, plus some sample results. Follow the flow chart below to a suggested method, then read the corresponding write-up to find out if it's right for you. But first...

General Supplies:
  • Foam wig head or clothing line (for applying the dye or drying)
  • Gloves (rubber or latex)
  • Hair clips (for sectioning off wefts)
  • Plastic drop sheet for dripping colour
  • Mask with filter to prevent inhalation of fumes and particulates
General Notes:
  • Results vary depending on the type of fibres.
  • You cannot dye a wig a lighter colour. You can airbrush it lighter - more on that in the  Airbrushing section.
  • I highly suggest starting with a white wig or wefts. If white is not available then light colours like silver or titanium blonde.
  • If you are dyeing a coloured wig, stick with colours within that range (lilac to purple to dark purple to black).
  • Only heat resistant fibres can be used with fabric dyes and tea dyeing.
  • For my sample results see the bottom of the blog.
Wig dye glow chart
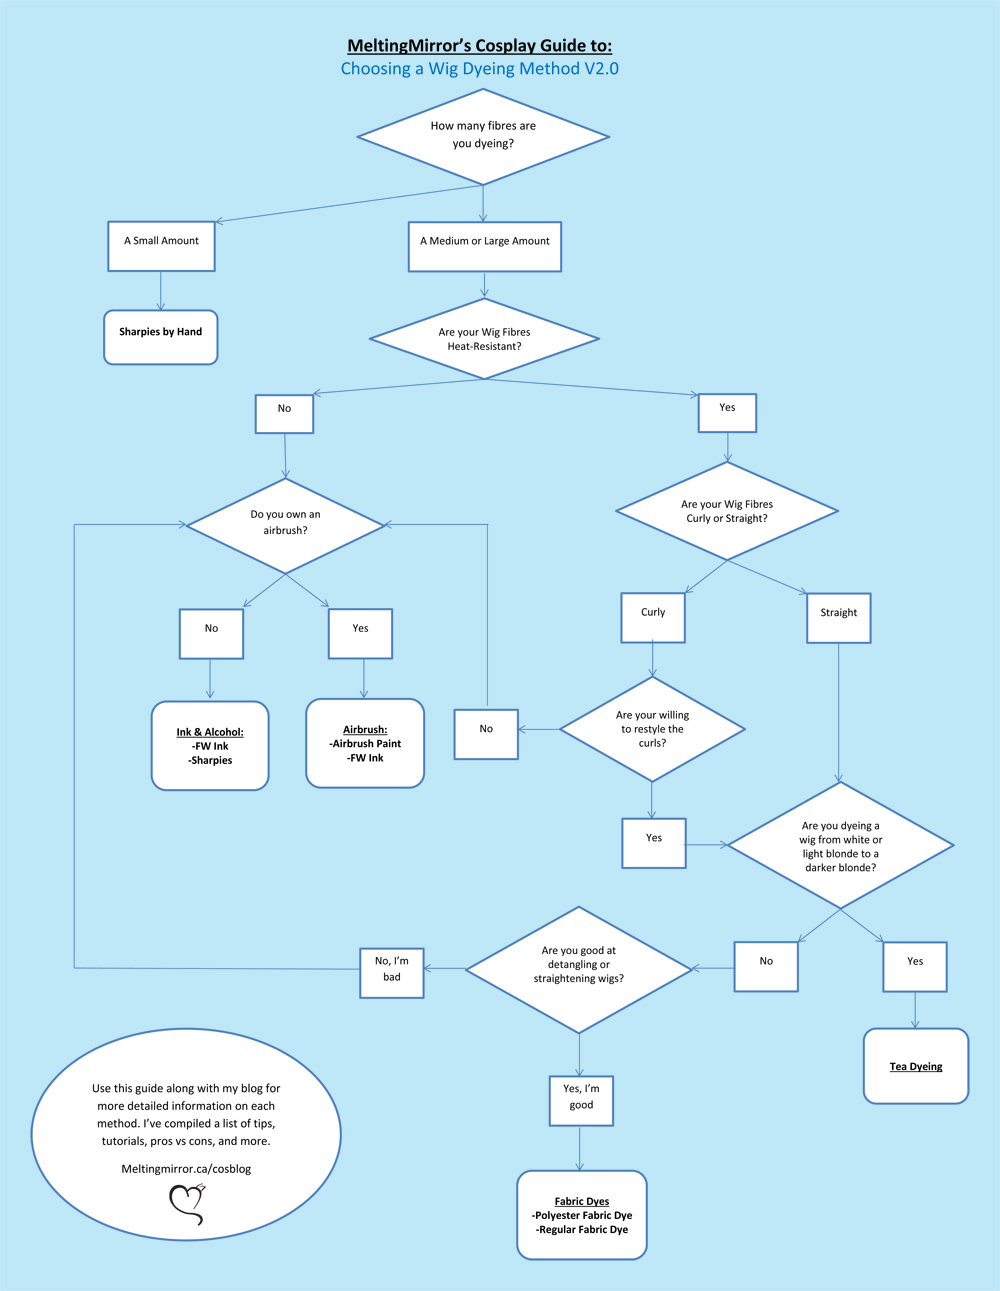
Click for full resolution

Ink & Alcohol
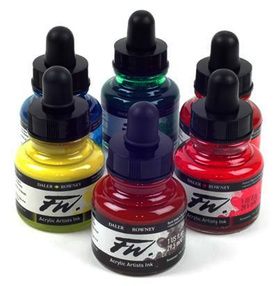
Picture
Supplies:
  • Acrylic ink (FW Ink recommended)
  • 70% alcohol
  • Spray bottle

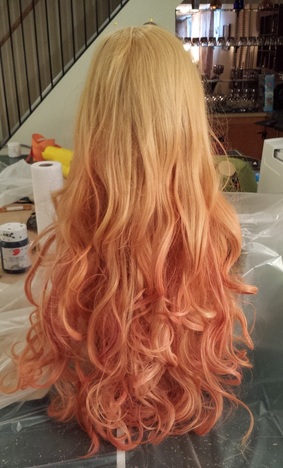
Technique(s):
Mix ink and alcohol in spray bottle and spray onto wig. Let dry before carefully brushing it then rinsing it with cold water.

Note
: The pearlescent FW ink have a fine glitter which adds shine but can rub off.

Pros:  Easy to coat large amounts of fibres with little ink. Simply add more ink to intensify colour. Good for getting consistent colour and easy to make new colours by mixing inks. Great for applying gradient effects. Easy to detangle fibres after dyeing. Can be used on curly and non heat-resistant wigs.

Cons:
Strong smell, not as precise as hand drawn Sharpie, can sometimes rub off, messy to apply, leaves and be hard to find product locally (FW ink).

Tutorial/links: Arda's tutorial &  Cosplay.com thread

Airbrush

Picture
Supplies:
  • Airbrushing paint or FW Ink
  • Airbrush system

Technique(s):
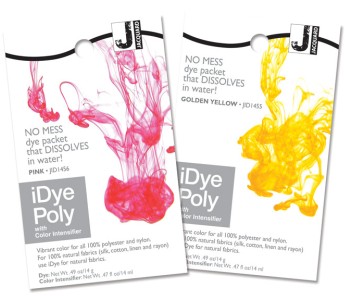
Apply light coats onto wig. For Ink: Rinse wig in cold water after application.   For both: Comb dry wig to remove crispiness from fibres. Note: when applying multiple layers there is a build up on the fibres adding texture and volume. Also it makes the wig fibre matte.

Pros:  Easy to cover large amounts of fibres easily. Can apply lighter colours onto darker wigs using airbrush paint, however, not recommended for coating large amounts of long wefts. Can be used on curly, fully styled (crazy spikes and the like), and non heat-resistant wigs.

Cons:
  Can make your fibres rough.
If using ink, the airbrush can use it up quickly, making it less cost efficient than the alcohol and ink method (above).

Tutorial/links: Technoranma's Guide

Fabric Dyes

Picture
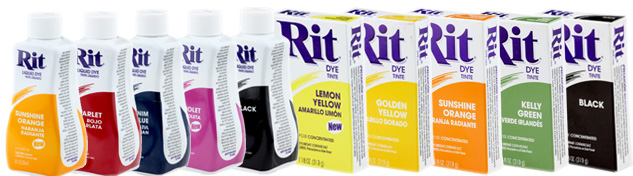
Recommend for dyeing large amounts of fibres
**Fibres must be heat resistant**

Supplies:
  • Fabric Dye - Polyester Dye, specifically iDye Poly is recommended
  • Stainless steel pot with boiling hot water (Not used for cooking)

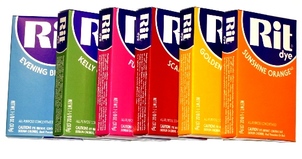
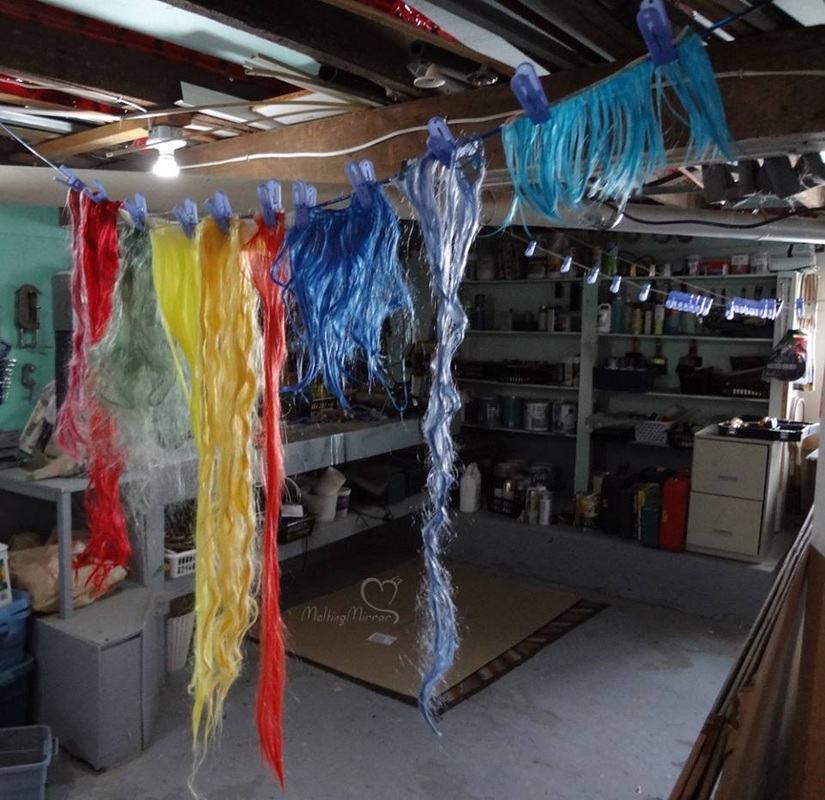
Technique(s):
Boil water then add dye (and intensifier) and stir. Submerge wefts/wig and stir while boiling. Remove after a few minutes then hang to dry. Detangle the wig, then either flat-iron it straight or restyle the fibres.
Dip dye to get a gradient effect.

Mutual Pros: Can dye large amounts of wig fibres. Can gradient dye.

Mutual Cons: Boiling water curls and tangles the wig which means you have to detangle and straighten it afterwards. Cannot be used on curly wigs unless you are willing to restyle it. Limited colour choices. Colour can be patchy if not stirred properly, and can stain your floor/tables/appliances.

Tutorial/links: Arda's colour dyeing chart

Polyester

Picture
Solo Pros: Colour is true to the package.

Regular Fabric Dye

Picture
Solo Cons: Colour is not true to package, therefore, you need to do a test batch before committing.

Sharpies

Sharpies
Supplies:
  • Sharpie(s) or Alcohol based Pens

Technique(s)
:

Sharpie application by hand is recommended for small amounts such as, colouring roots, streaks, and block or pixel effects. For medium to large projects, look at the alternate techniques listed in the tutorial section.
I prefer doing this on a flat surface, so I lay out some white paper on my work area. Warning: do not use newspaper because the ink may stain your wig. When complete rinse with cold water until it runs clear.


Pros
:
Precise if done by hand. Guaranteed colour matching results.

Cons: Strong smell, sometimes rubs off or runs, very time consuming (by hand), messy to apply, and can stain your floor/tables/appliances.

Tutorial/links: By Spray bottle | By batch/bucket  | By sponge

Tea

Picture
Recommend for dyeing large amounts of fibres to natural light blondes.
*Fibres must be heat resistant*

Supplies:
  • Dark tea bags (or coffee)
  • Pot of hot water

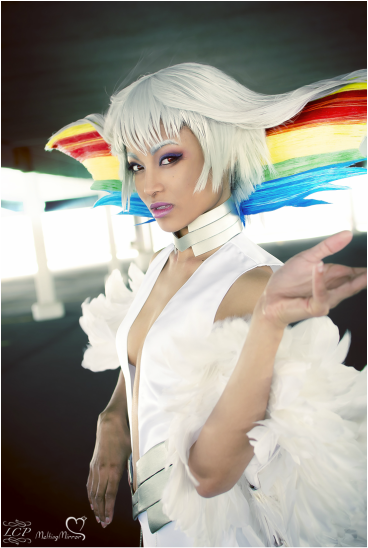
Technique(s):

Bring water to a boil, then reduce to low heat. Add many tea bags and let it steep. Once water has darkened from tea (5-10min), turn off the element and submerge the wig. Let it soak until the water cools or you reach the desired colour.
Note: there may be potential to tint light coloured wefts pink by using different coloured teas (roobios or hibiscus comes to mind), however, I have yet to see someone test this out.

Pros: Natural look. Can dye large amounts at once.

Cons:
Very limited colour choice (white to pale blonde or Pale blonde to a slightly darker blonde), and it takes a long time to set. Varied results depending on fibres and tea used. fibres may need to be detangled or straightened once dry.

Tutorial/links: Courtoon's Tutorial 


Sample Results

I had to dye a lot of fibers for my Ragyo cosplay and I used many of the methods above. Here are the results of dyeing white wefts.

FABRIC, INK, & SHARPIE  DYEING
From the left (bottom image):

  1. Royal blue Tintex - left in boiling water for 5 mins after completing another batch (See #3) It looks nothing like the package (almost purple)
  2. Hand-dyed orange Sharpie - This took a long time and the colour rubs off a bit even after rinsing it 
  3. Royal blue Tintex - left in boiling water for about 8 min. Results match the packaging
  4. Hand dyed light blue Sharpie - also tedious to colour
  5. FW ink in canary yellow - Mixed with alchohol and sprayed onto wefts. It almost looks neon, very vivid colour
  6. Idye poly in red - left in boiling water for 3mins with half a packet of dye and it matches the packaging
  7. Yellow-gold Dylon dye - Left in boiling water for about 9-10min with the full tin to make sure the colour stayed. The result is more yellow (lighter) than the packaging
  8. Two shades of green Tintex dye in boiling water for 7 mins
Picture
Notice how messy and tangled the wefts are after boiling.
Picture
Wefts were combed then straightened with a flat-iron.
Picture
TEA DYEING

I've gotten mixed results with tea dyeing. I manage to tint a pale blonde wig to a this slightly ash blonde colour. See photo left for the result. It wasn't as dark as I wanted but it could probably be adjusted by using another darker tea, trying coffee instead, or maybe more tea bags. Hidden bonus of this method: the nice smell of tea when you flip your hair.

I can see the practicality of tea dyeing when mixing your own natural colours using ink is tricky.
AIRBRUSH
This method came really in handy when I was dealing with a multi-coloured gradient wig. I could airbrush the bangs easily and precisely.  The wig was a little shiny so the paint was useful in dulling the shine. I used a mix of FW inks and Createx "Opaque Coral" airbrush paint for the orange.

I airbrushed the roots by the skin top with white Createx paint. It's subtle but a nice touch to continue the gradient look. I also added streaks of pink but it is not as noticeable as the orange. Wigs of any colour but white and light silver will give weaker colour results unless you really layer it on.

Notice how the wig still has it original curls even after applying the paint.

Good luck on your projects!
-MM
Picture
1 Comment
Min
25/12/2018 07:29:32 pm

Hi! I have several questions
1. Will the tea dying method work on a already coloured wig to desaturate the colour? (E.g from a Epic Cosplay wig in tea green to a desaturated tea green)
2. For the airbrushing method, does it work if I only use the FW ink? Can I make it like regular dyeing and add both FW ink and alcohol to airbrush-dye the wig? (What I’m asking is can I combine both the ink-alcohol method and the airbrushing method)
3. For all of these dyeing methods, does the dye wash off? Is there a way to preserve the dyed colour?

Thanks a lot,

Min :)

Reply


Leave a Reply.

    MeltingMirror's Cosplay Blog

    Learn more about my experiences in the cosplay world, from conventions to photoshoots and everything in between.

    RSS Feed

      Suggestion Box

    Submit

    Categories

    All
    2011
    2012
    2013
    2014
    2015
    2016
    2017
    2018
    2019
    2020
    2022
    Aion
    Anime
    Anime Convention
    Anime North
    Artist Alley
    Awards
    Book
    Colossalcon
    Comiccon
    Commission
    Conbravo
    Convention
    Cosplay
    Cosplay History
    Cosplay Trip
    CostumeCon
    Crunchyroll
    Dance
    Dragoncon
    Exhibit
    Fanexpo
    Fashion
    G Anime
    Guest
    Judging
    Katsucon
    Lifestyle
    Makeup
    Masquerade
    Montreal
    Nadeshicon
    Nycc
    Original Design
    Otakon
    Otakuthon
    Ottawa
    Panels
    Photoshoot
    Popexpo
    Prints
    Props
    Retrospective
    Review
    Social Media
    Travel
    Troubleshoot
    Tutorial
    Wigs
    World Cosplay Summit
    Yeticon
    Youmacon

© MeltingMirror. All rights reserved
Picture