MeltingMirror Cosplay

  • Home
  • Costumes
  • Upcoming
  • CosBlog
  • Media
  • Contact Me
  • Home
  • Costumes
  • Upcoming
  • CosBlog
  • Media
  • Contact Me

Houseki no Kuni - Alexandrite - Wig tutorial

27/3/2018

1 Comment

 
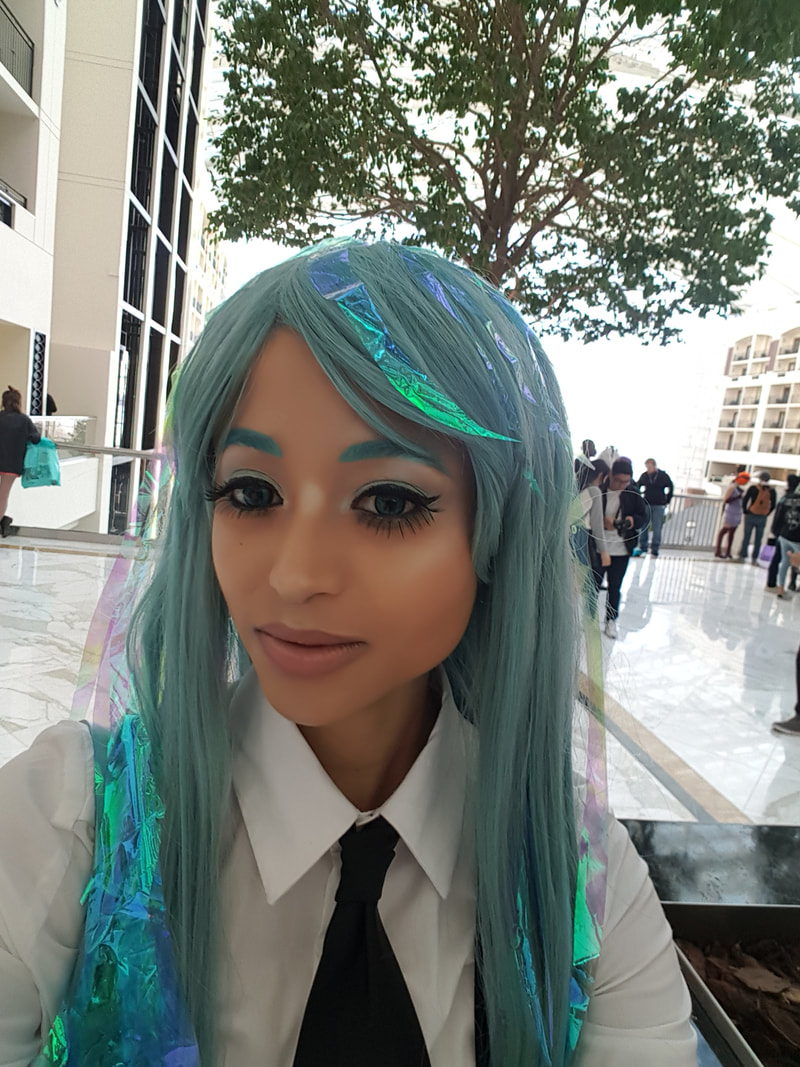
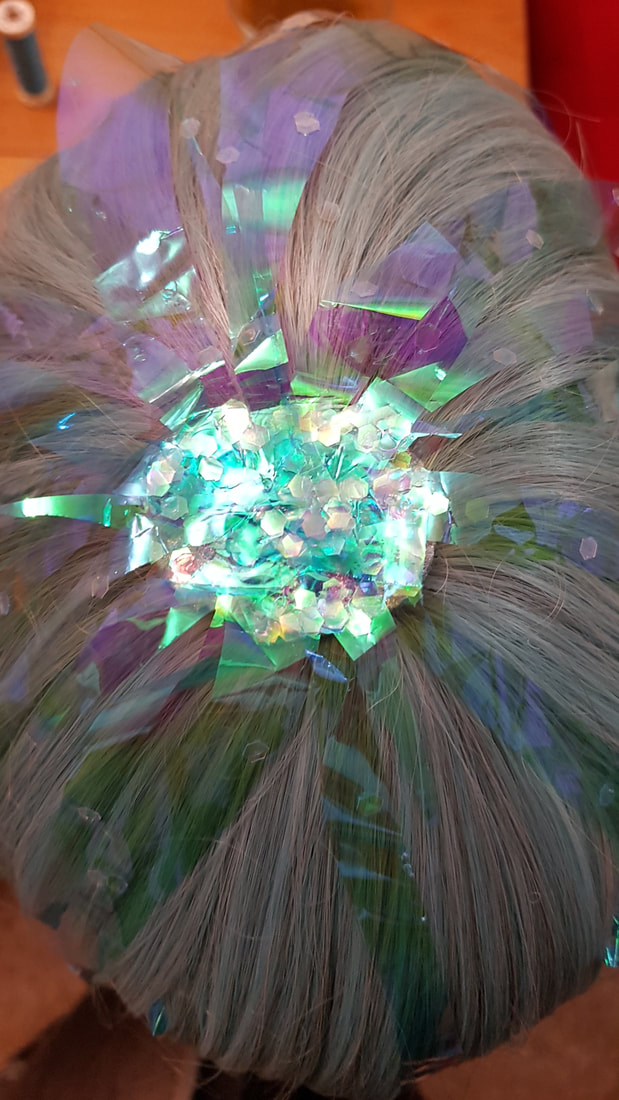
I made a sparkly wig for an Alexandrite cosplay fit for the Land of the Lustrous. All the decorations are removable so that I could reuse the wig for other costumes. 
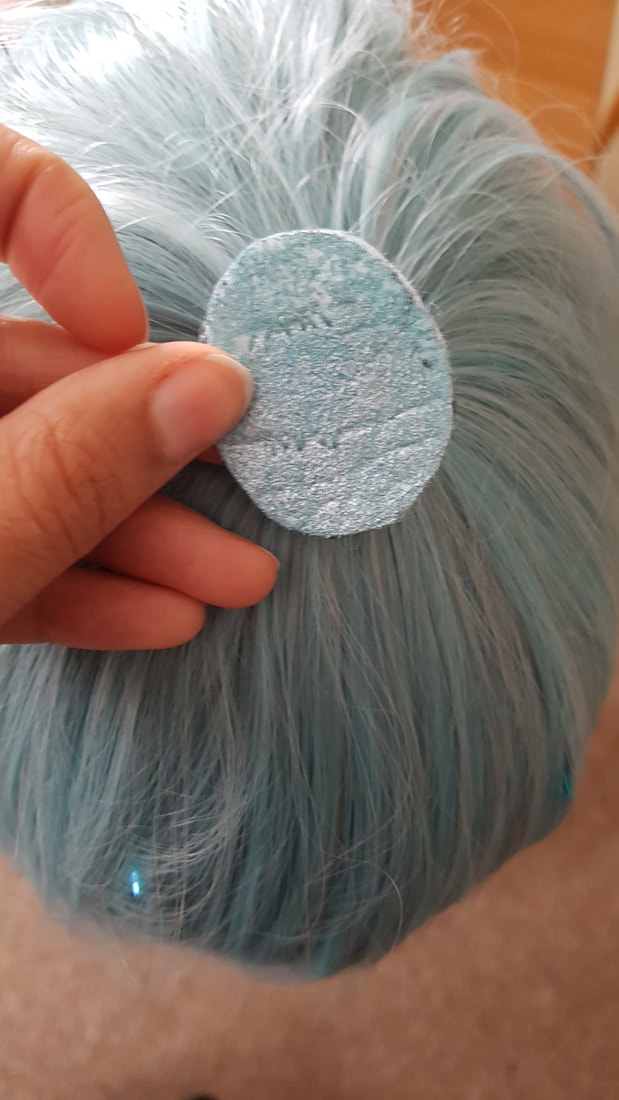
Picture
Indoor light
Picture
Natural Light

Materials

  • wig (Cut and styled) - I used a Silky Venus in Cerulean from Arda
  • craft scissors (sharp ones)
  • Clear tape
  • Needle and thread to match the wig
  • Measuring tape
  • E6000 glue
  • Glitter that matches your wig
  • Felt or buckram (that matches or wig - if not get some paint that does)
  • Two-tone Cellophane/wrapping plastic that compliments your wig 
  • 15+ bobby pins
  • Hair clips
  • Gloves (latex, vinyl, whatever works for you)

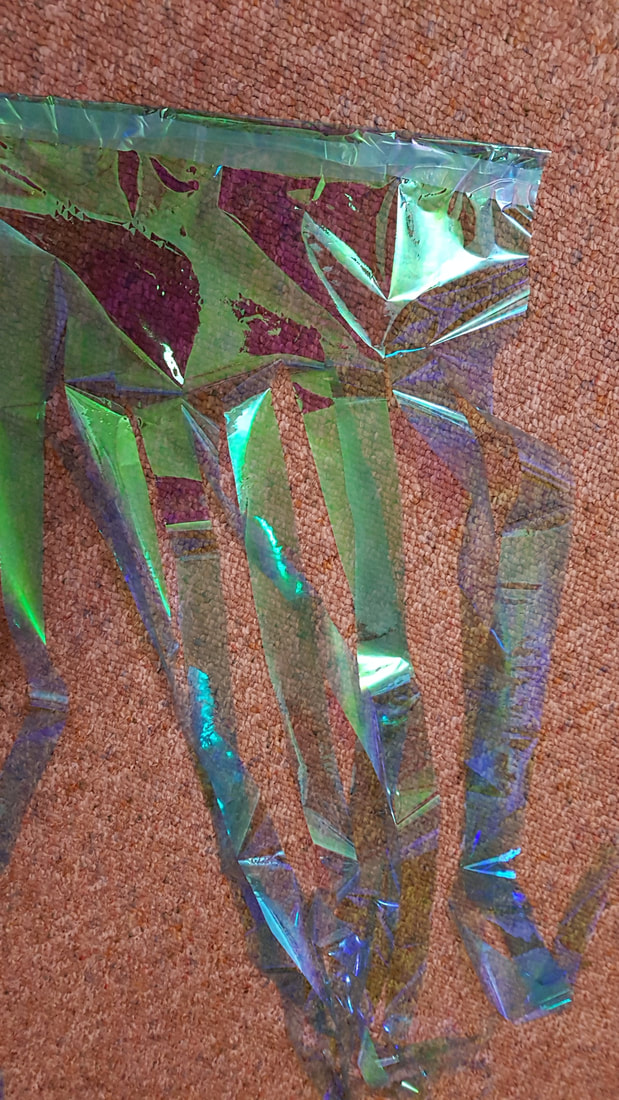
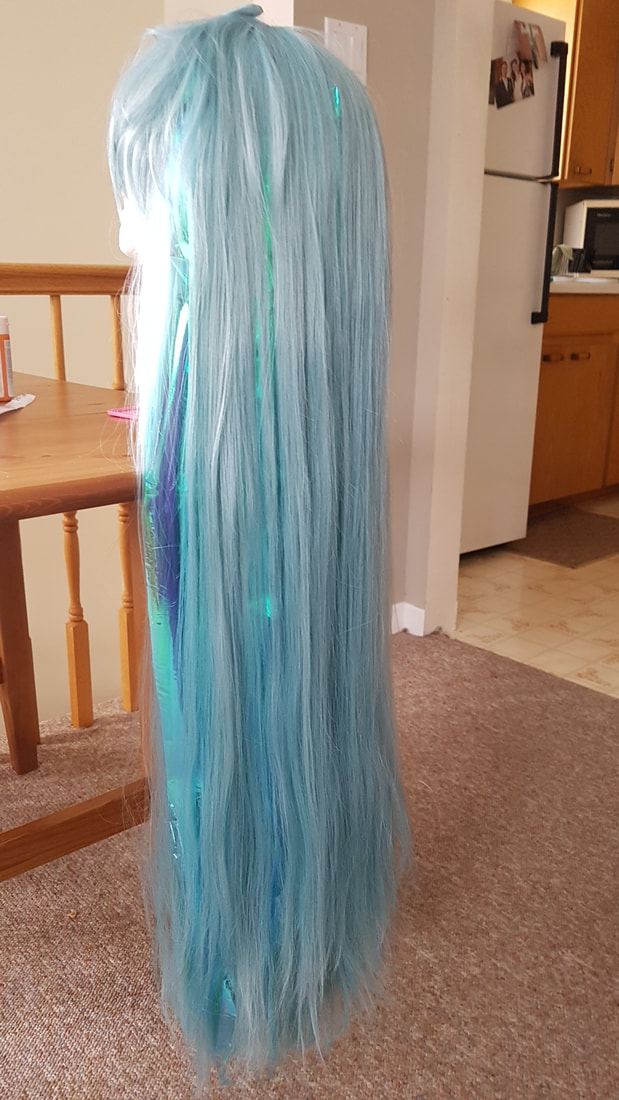
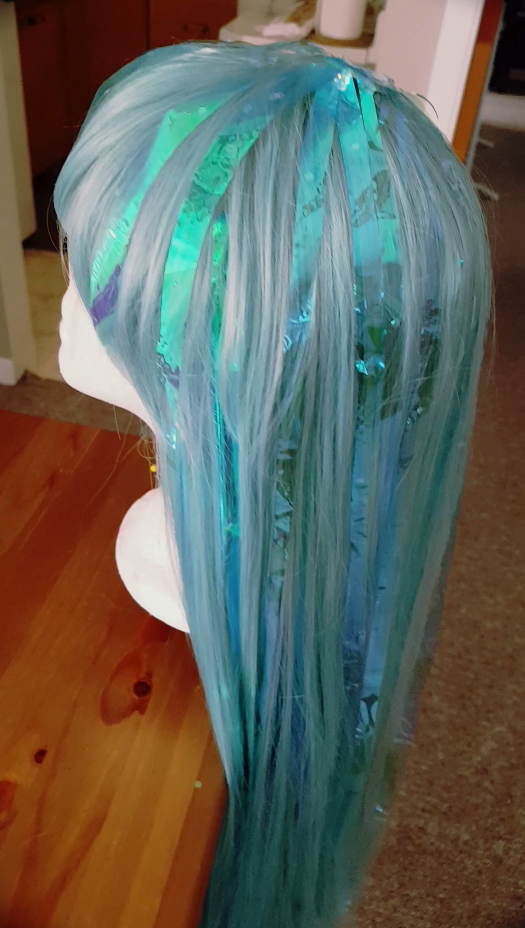
Assembly Part 1 - Cellophane wefts

  1. Expose the row of wefts where you want to install your cellophane wefts and pin the excess hair away using a hair clip. Measure the length of your wefts to determine how long your cellophane pieces need to be (ex. 32in/82cm). Measure the distance between one side of the wig to the other where you plan to install the wefts (ex. 15 in/38cm). I installed two rows, one slightly above the nape of my neck and another one slightly below where the top of the wig where the weft pattern change and you can't us bobby pins.
  2. Cut out a segment of cellophane in those measurements (ex 32inX15in / 82cmX38cm).
  3. Fold over the edge on the short side to fortify with clear tape
  4. Cut vertically up to the tape, without cutting through it, making cellophane stands of hair. I made mine about 1.5in/3.8cm wide.
  5. (Optional) Taper the ends so it looks more hair like, since the square ends don't blend well. Keep the square ends if your character has blunt edges.
  6. Secure your cellophane wefts to the wig with bobby pins.
  7. Repeat for a second row of wefts.

Assembly Part 2 - Sparkly Hair Part

  1. Cut out a piece of felt to act as the base of your new cellophane hair part. Since the wig I`m using has a round skin top, I cut out a small circular piece. I used Flexifirm but felt or buckram will do the trick. In retrospect, I would make mine a little smaller, 1in/2.5cm would have been better than 2in because it would be easier to blend into the wig. Paint it to match the wig if it doesn't already.
  2. Once dried, hand stitch to the top of the wig.
  3. Put on your gloves, then apply a thin layer of E6000 to the round then cover in glitter. Note: E6000 is pretty toxic so use gloves and be sure the place is well ventilated.
  4. Measure lengths for cellophane strands and pay close attention to any curves to your wig. For example, Alexandrite has bangs parted to the side, so I had to cut curved pieces to match how the hair sits. Also taper the ends of the strand that will be glued down. You don't want blunt edges sticking out of the sides.
  5. Add more E6000 to attach cellophane strands. Let dry between layers of application or else the lower layers may come loose. I had to build up about 3 layers to get the coverage I wanted by overlapping cellophane pieces. You can add a little more glitter on top once done.

Add more Sparkle & Pizzaz

I added some extra glitter to my wig to blend in my "glitter top" by hand applying chunky glitter to cellophane strands using toothpicks and E6000. I've seen people use rhinestones or glitter flakes and I've seen people make cowlicks with cellophane. Do what you want to be your true gem self.

How to Wear

Since I wanted my wig to be reusable for other costumes nothing is glued down, however, I ran into an issue when I tried on the wig. The short wefts, the one close to my face, especially any wefts that are curved, can easily be kicked up by the slightest breeze. To secure these strands I used some eyelash glue and tacked them down at the ends.

​If you are going for a more permanent solution I would suggest something like Gemtack since it dries nice and clear.

Be truly outrageous!

Which gem will you be making? Share your finished projects, I would love to see it.

via GIPHY

1 Comment
Leira
27/3/2018 04:33:41 pm

Ahh😃 Thank you so much for this. I've been trying to work on my wig for Phos and Cinnabar. However, like you, I want to be able to reuse the wigs. So this is the most helpful tutorial for these cosplays 🙏 Again, thanks!

Reply


Leave a Reply.

    MeltingMirror's Cosplay Blog

    Learn more about my experiences in the cosplay world, from conventions to photoshoots and everything in between.

    RSS Feed

      Suggestion Box

    Submit

    Categories

    All
    2011
    2012
    2013
    2014
    2015
    2016
    2017
    2018
    2019
    2020
    2022
    Aion
    Anime
    Anime Convention
    Anime North
    Artist Alley
    Awards
    Book
    Colossalcon
    Comiccon
    Commission
    Conbravo
    Convention
    Cosplay
    Cosplay History
    Cosplay Trip
    CostumeCon
    Crunchyroll
    Dance
    Dragoncon
    Exhibit
    Fanexpo
    Fashion
    G Anime
    Guest
    Judging
    Katsucon
    Lifestyle
    Makeup
    Masquerade
    Montreal
    Nadeshicon
    Nycc
    Original Design
    Otakon
    Otakuthon
    Ottawa
    Panels
    Photoshoot
    Popexpo
    Prints
    Props
    Retrospective
    Review
    Social Media
    Travel
    Troubleshoot
    Tutorial
    Wigs
    World Cosplay Summit
    Yeticon
    Youmacon

© MeltingMirror. All rights reserved
Picture